使用 Github 搭配图片上传工具PicGo或者PicX搭建免费图床,配置Markdown编辑器Typora自动上传图片,并配置CDN加速访问
前置条件
公开Github仓库,下文以
10wen/image-hosting为例;
生成 token
注意:生成token后保存下来,避免刷新页面token被隐藏
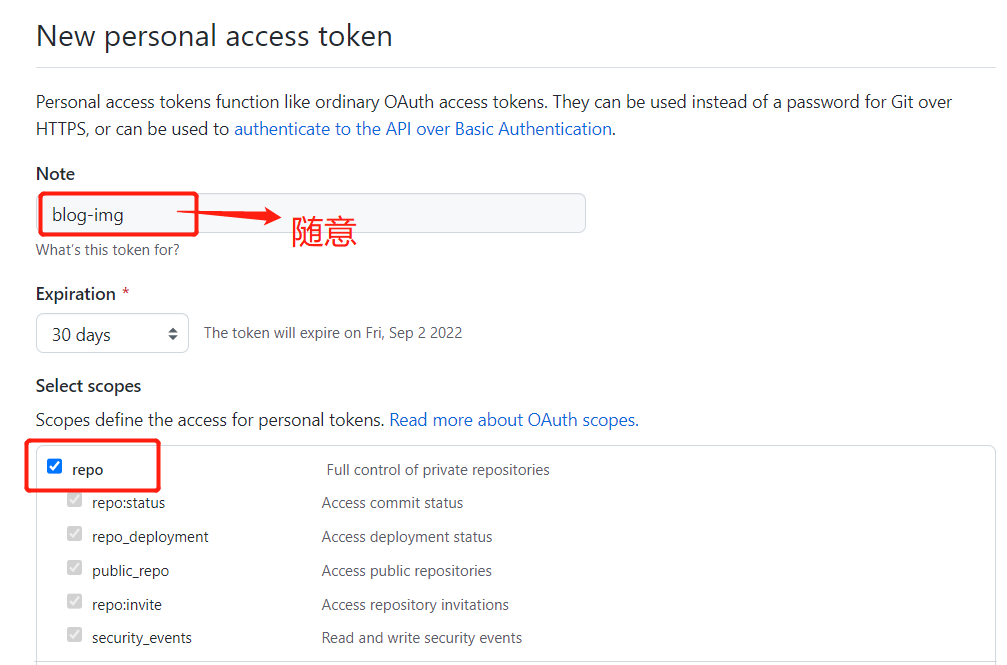
Github搭配PicGo+Typora
打开PicGo上传区选择Github
PicGo配置Github
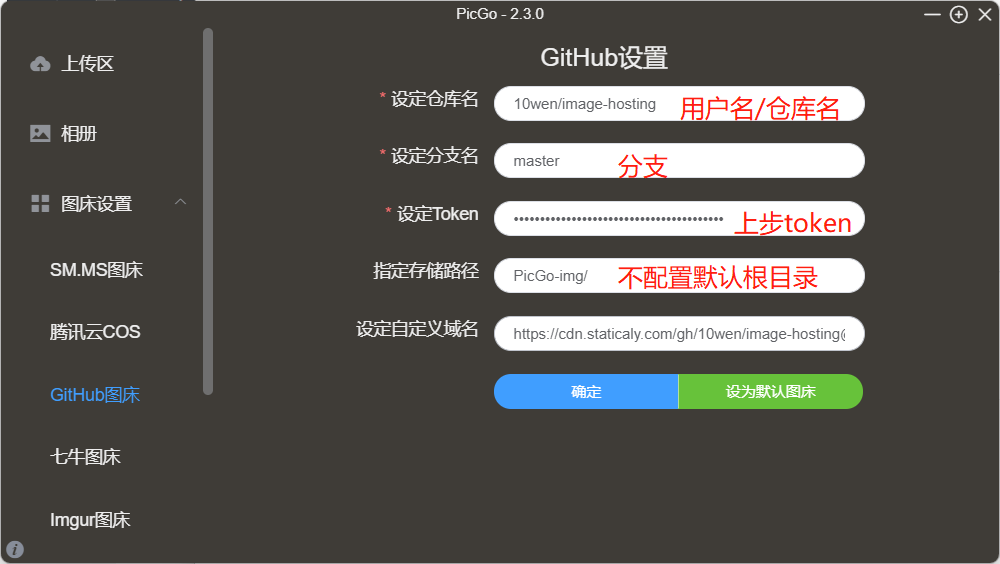
为了达到加速访问,配置CDN外链设定自定义域名:https://cdn.staticaly.com/gh/用户名/仓库名@分支名,例如:https://cdn.staticaly.com/gh/10wen/image-hosting@master
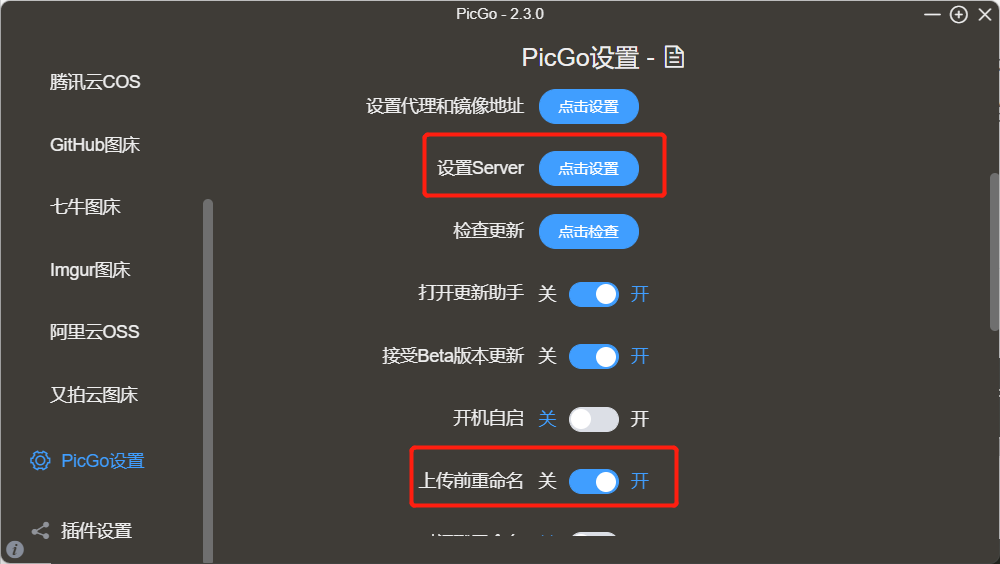
PicGo设置
开启PicGo-Serve保持默认地址127.0.0.1以及端口36677,打开上传重命名,
Typora偏好设置-图像
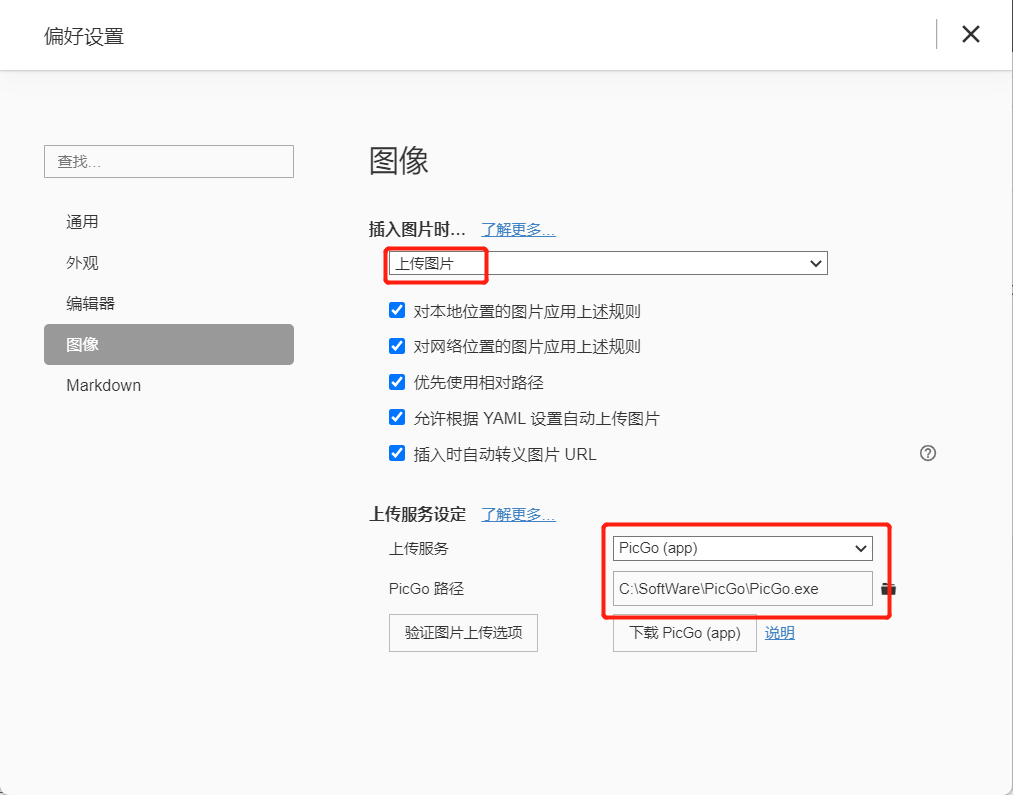
验证图片上传
向typora插入图片出现如下效果:
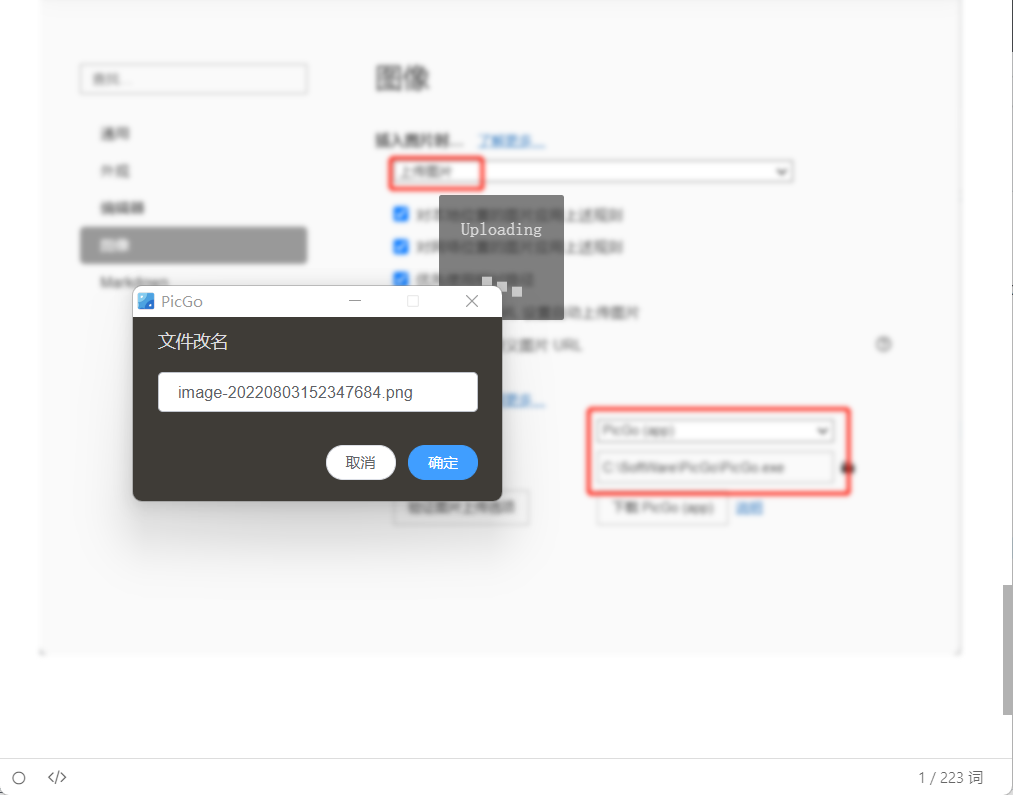
重命名上传图片后发现图片地址改为外链地址则为配置成功,愉快的写文章
Github搭配PicX
打开PicX官网-图床配置
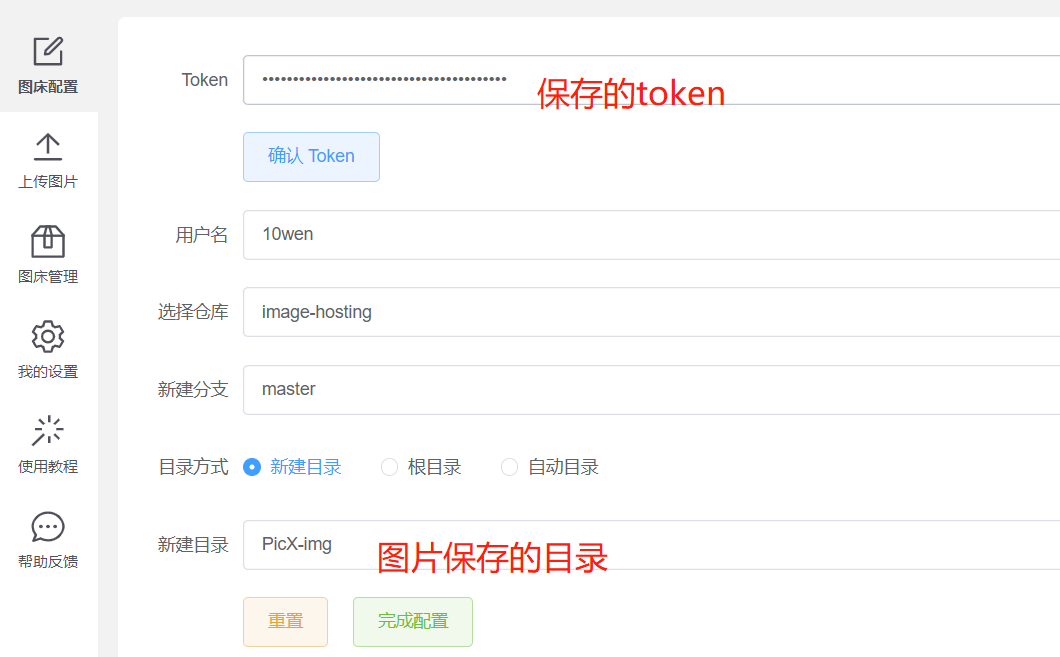
完成配置即可
关于图片外链地址
没有配置CDN:
原生github静态资源地址
https://raw.githubusercontent.com/{user}/{repo}/{branch}/{folderpath}/{filename}
例如:https://raw.githubusercontent.com/10wen/image-hosting/master/PicGo-img/example.png
配置CDN外链:
jsdelivr
自定义域名:https://cdn.jsdelivr.net/gh/{user}/{repo}
图片地址:https://cdn.jsdelivr.net/gh/{user}/{repo}/{folderpath}/{filename}
例如:https://cdn.jsdelivr.net/gh/10wen/image-hosting/PicGo-img/example.png
staticaly
自定义域名:https://cdn.staticaly.com/gh/{user}/{repo}@{branch}
图片地址:https://cdn.staticaly.com/gh/{user}/{repo}@{branch}/{folderpath}/{filename}
例如:https://cdn.staticaly.com/gh/10wen/image-hosting@master/PicGo-img/20220803155716.png

